Getting started · Fireflies
Connect Fireflies.ai to ArcGlass
Connect a Fireflies.ai account using its API key and create a Calls and Meetings pipeline. About five minutes, start to finish.
Full walkthrough — connecting a meeting tool (Granola, Fireflies, Fathom) end to end.
Before you begin
What you'll need
ArcGlass access
An ArcGlass account with permission to create pipelines.
Fireflies access
A Fireflies.ai account with access to Settings.
API access
Permission to view or copy the Fireflies API key.
Security
A secure place to handle the API key during onboarding.
At a glance
The three-step flow
01
Select Fireflies
Start a Calls and Meetings pipeline and choose Fireflies.
02
Copy API key
Find and copy the key from Fireflies Developer Settings.
03
Create pipeline
Paste the key, review defaults, and create the pipeline.
Step by step
The full walkthrough
01
Start a Fireflies pipeline
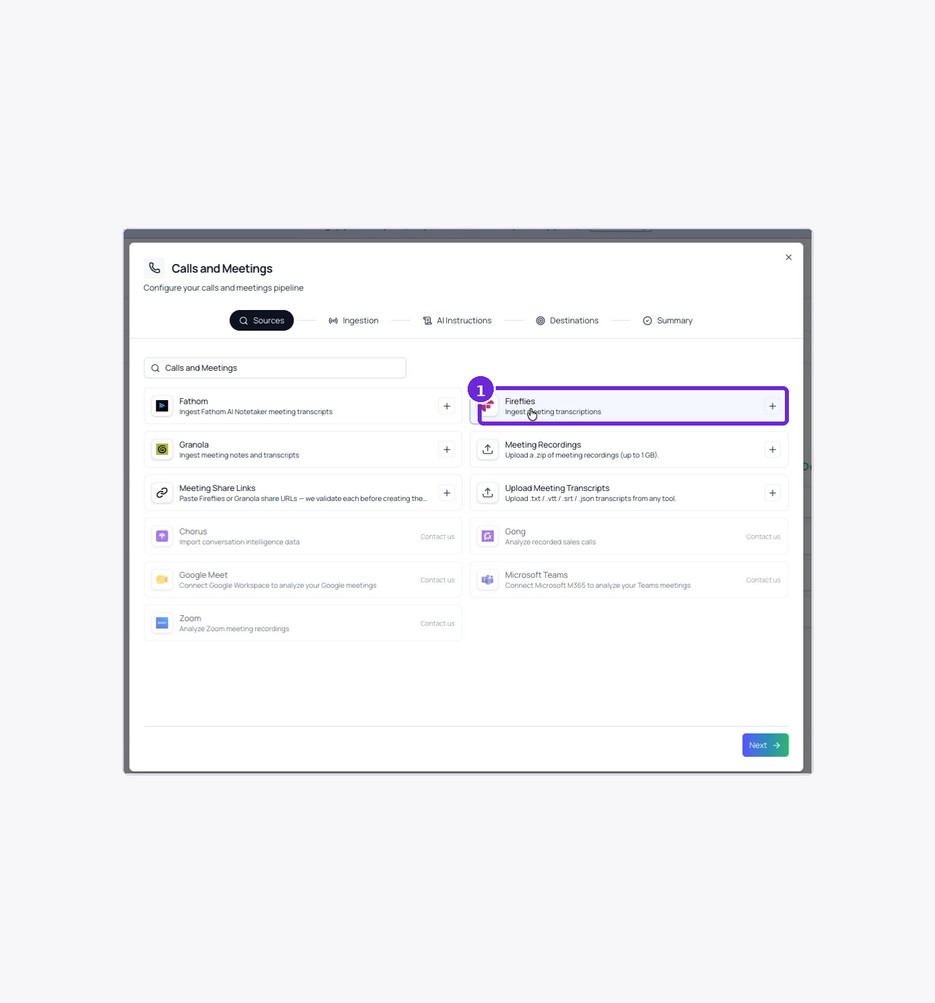
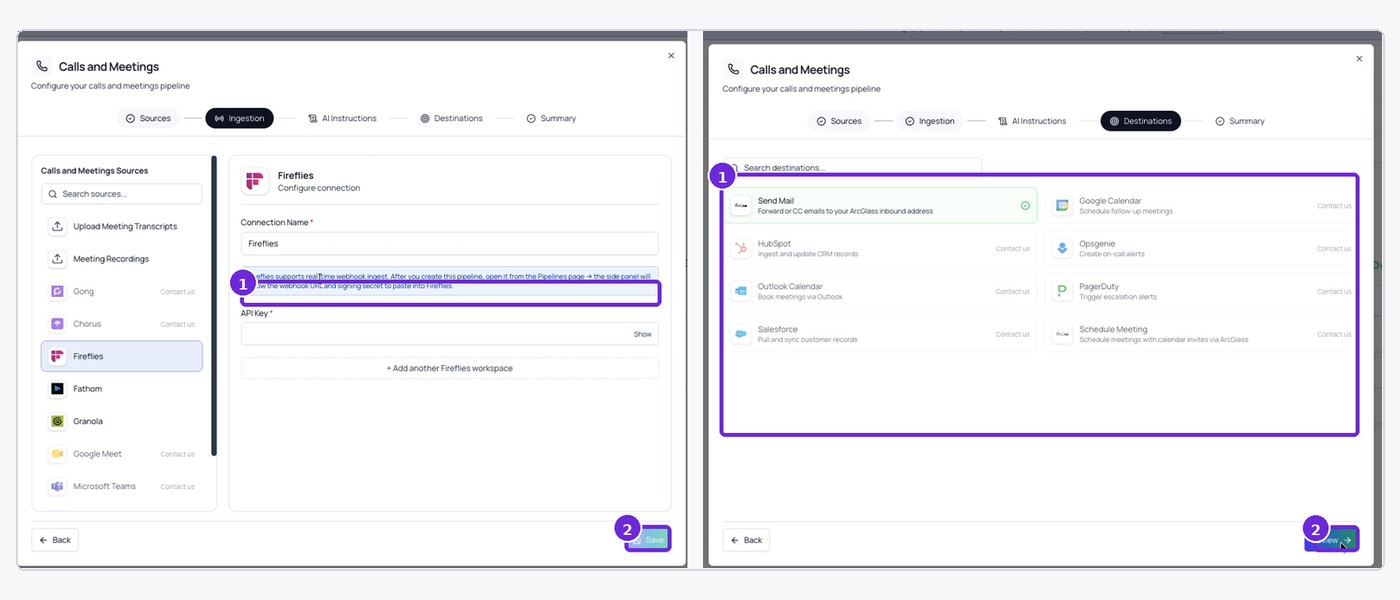
- Open Settings › Pipelines. Select Onboarding, then start a Calls and Meetings pipeline.
- Choose Fireflies. On the Sources page, select Fireflies from the meeting sources.
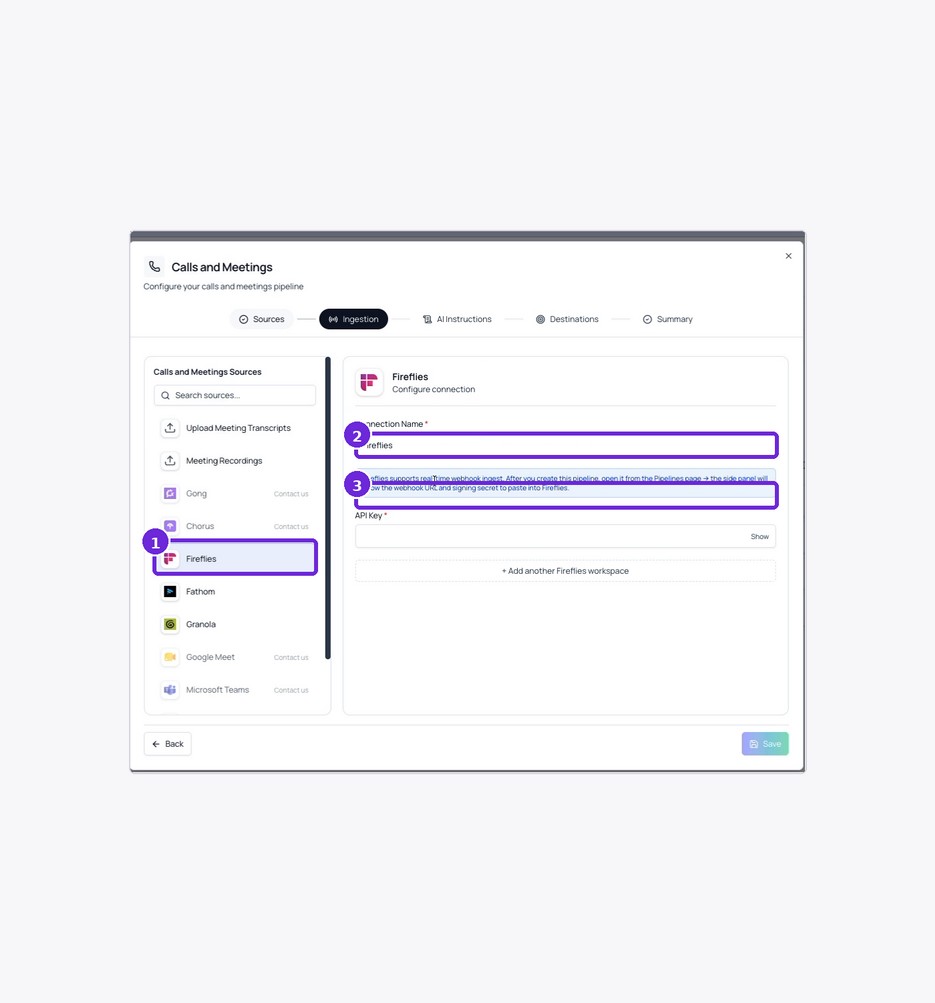
- Review the connection fields. Keep the Connection Name as Fireflies unless you need a different label.
- Open Fireflies in another tab. Sign in to the Fireflies account that ArcGlass should process.
Tip — Use the API Key under Developer Settings. The MCP server URL is not the credential required by this ArcGlass connector.
02
Copy the Fireflies API key
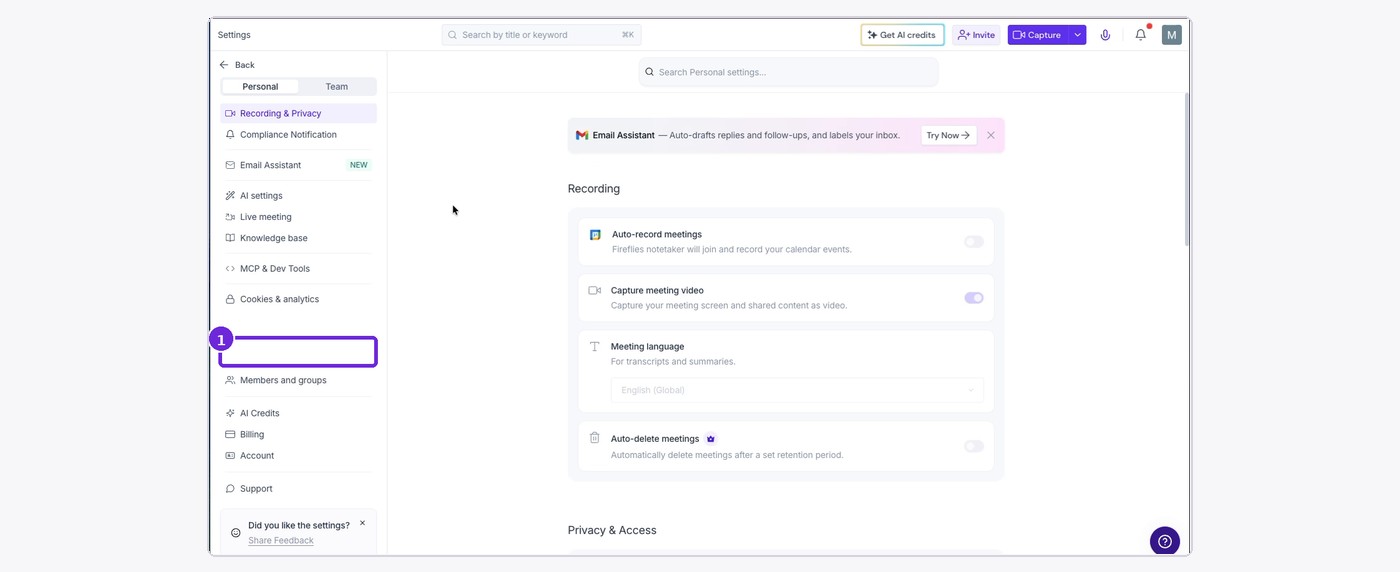
- Open Fireflies Settings. From the Fireflies application, open Settings.
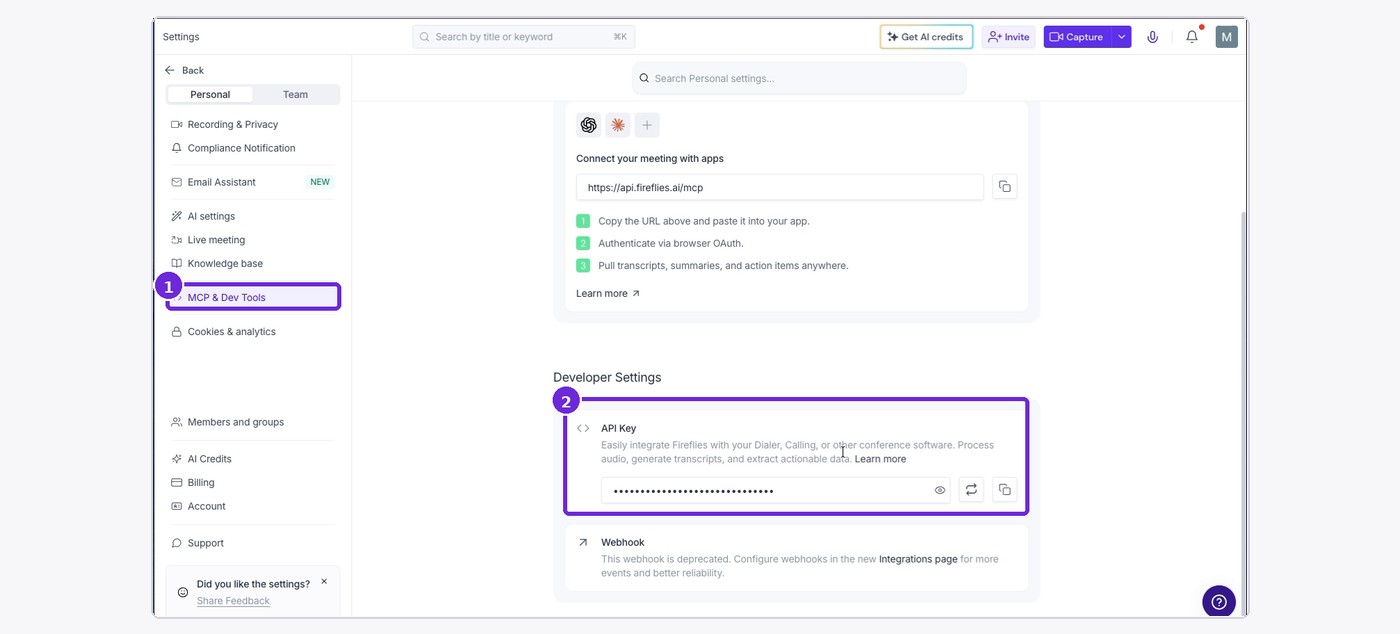
- Select MCP & Dev Tools. Scroll to the Developer Settings section.
- Copy the API key. Use the copy control next to API Key. Do not use the MCP URL or webhook settings.
03
Connect Fireflies and create the pipeline
- Paste the key in ArcGlass. Return to the Fireflies integration and enter the copied API key.
- Save the integration. Select Save or Next after ArcGlass accepts the key.
- Keep the supplied defaults. Proceed through AI Instructions and Destinations unless ArcGlass provides different settings.
- Name and create the pipeline. Review the summary and select Create Pipeline.

Confirm it worked
Confirm onboarding is complete
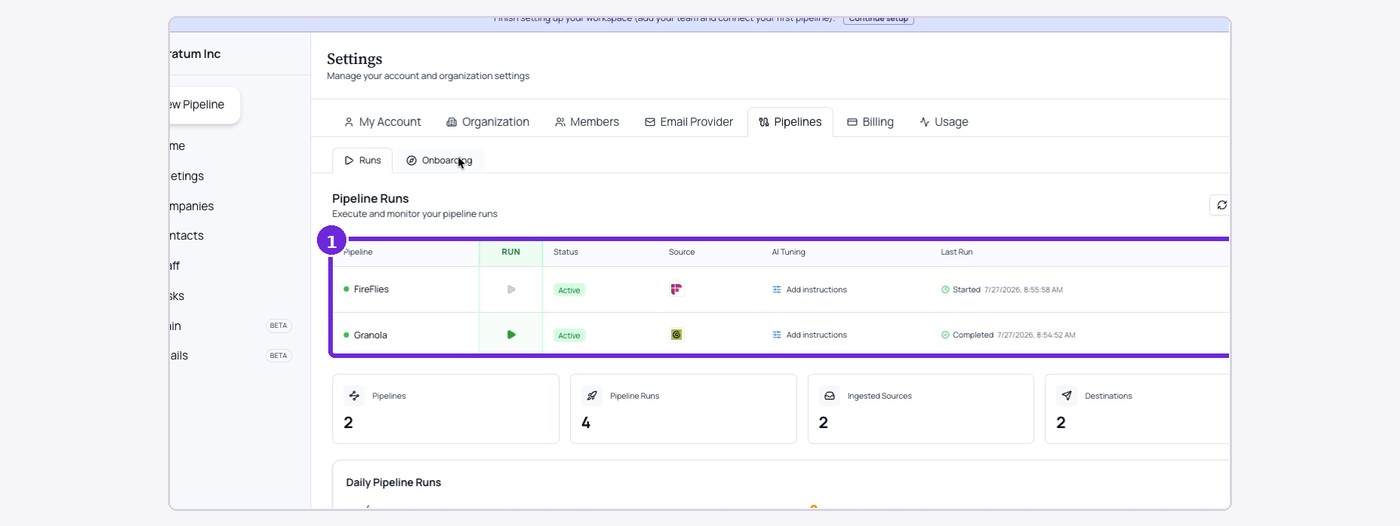
Open Pipeline Runs
The newly created Fireflies pipeline should appear in the list.
Verify status
The pipeline should show Active. ArcGlass will process Fireflies meeting transcripts as they become available.
You're done when
The Fireflies pipeline is Active and ArcGlass can authenticate to the selected Fireflies account.
If something's off
Quick troubleshooting
API key is not visible
Confirm you are in Personal Settings > MCP & Dev Tools and have API access.
Connection is rejected
Copy the API key again and make sure no extra spaces were included.
Wrong Fireflies account
Sign out and open Settings in the account that owns the required meetings.
No transcripts appear
Confirm Fireflies has completed transcription for the meetings.